Paper flower bouquets have become a popular choice for many people looking to add a touch of creativity and elegance to their special occasions. Whether for weddings, anniversaries, or simply as a decorative piece for your home, these handcrafted beauties offer a unique and lasting alternative to fresh flowers. In this article, we will dive deep into the world of paper flower bouquets, exploring their history, the materials used, and how to create stunning arrangements that will impress anyone.
As we journey through this topic, you will learn not only about the techniques involved in crafting these floral masterpieces but also the benefits they bring, such as sustainability and cost-effectiveness. The rise in popularity of paper flowers reflects a shift in consumer preferences towards eco-friendly options that still provide aesthetic appeal.
Join us as we explore the intricate art of paper flower bouquets. From the types of paper to use, to the various styles of arrangements, this guide will equip you with the knowledge to create your own beautiful paper flower bouquet.
Table of Contents
1. The History of Paper Flowers
Paper flowers have a rich history that dates back centuries. The origins can be traced to ancient cultures that utilized paper in various forms for decoration and ritual purposes. In Japan, origami, the art of folding paper into intricate shapes, has been practiced for generations, leading to the creation of beautiful paper flowers.
In Mexico, papel picado (perforated paper) and papel maché have been used in festivals and celebrations, showcasing the vibrant colors and designs that are now synonymous with paper flowers. The modern resurgence of paper flowers can be attributed to the DIY movement, where crafters and artists began to explore the medium for creating lasting floral arrangements.
Today, paper flower bouquets are celebrated for their versatility and are often featured in weddings, home decor, and various celebrations. Their ability to be customized in terms of color and design makes them a beloved choice for many.
2. Materials for Paper Flower Bouquets
Creating stunning paper flower bouquets requires a variety of materials, each contributing to the final look of your arrangement. Here are some essential materials you'll need:
- Cream and Colored Paper: Choose high-quality paper like crepe paper, cardstock, or tissue paper.
- Floral Wire: Use floral wire to create the stems for your flowers.
- Floral Tape: This tape helps wrap the wire and secure the flowers together.
- Glue: Hot glue or craft glue will help attach petals and leaves.
- Scissors: A good pair of scissors is essential for cutting paper.
- Optional Tools: You can also use tools like a bone folder for scoring or shaping the paper.
3. Types of Paper Flowers
There are numerous types of paper flowers you can create, each with its unique style and charm. Here are some popular types:
3.1. Crepe Paper Flowers
Crepe paper flowers are known for their texture and flexibility, making them ideal for realistic floral designs. They can be shaped easily, allowing for intricate petal designs.
3.2. Tissue Paper Flowers
Tissue paper flowers are lightweight and vibrant, often used for decorations at parties and events. They are simple to create and can be made in various sizes.
3.3. Cardstock Flowers
Cardstock flowers are more structured and can be used for a more polished look. They are perfect for formal arrangements and can be customized with different colors.
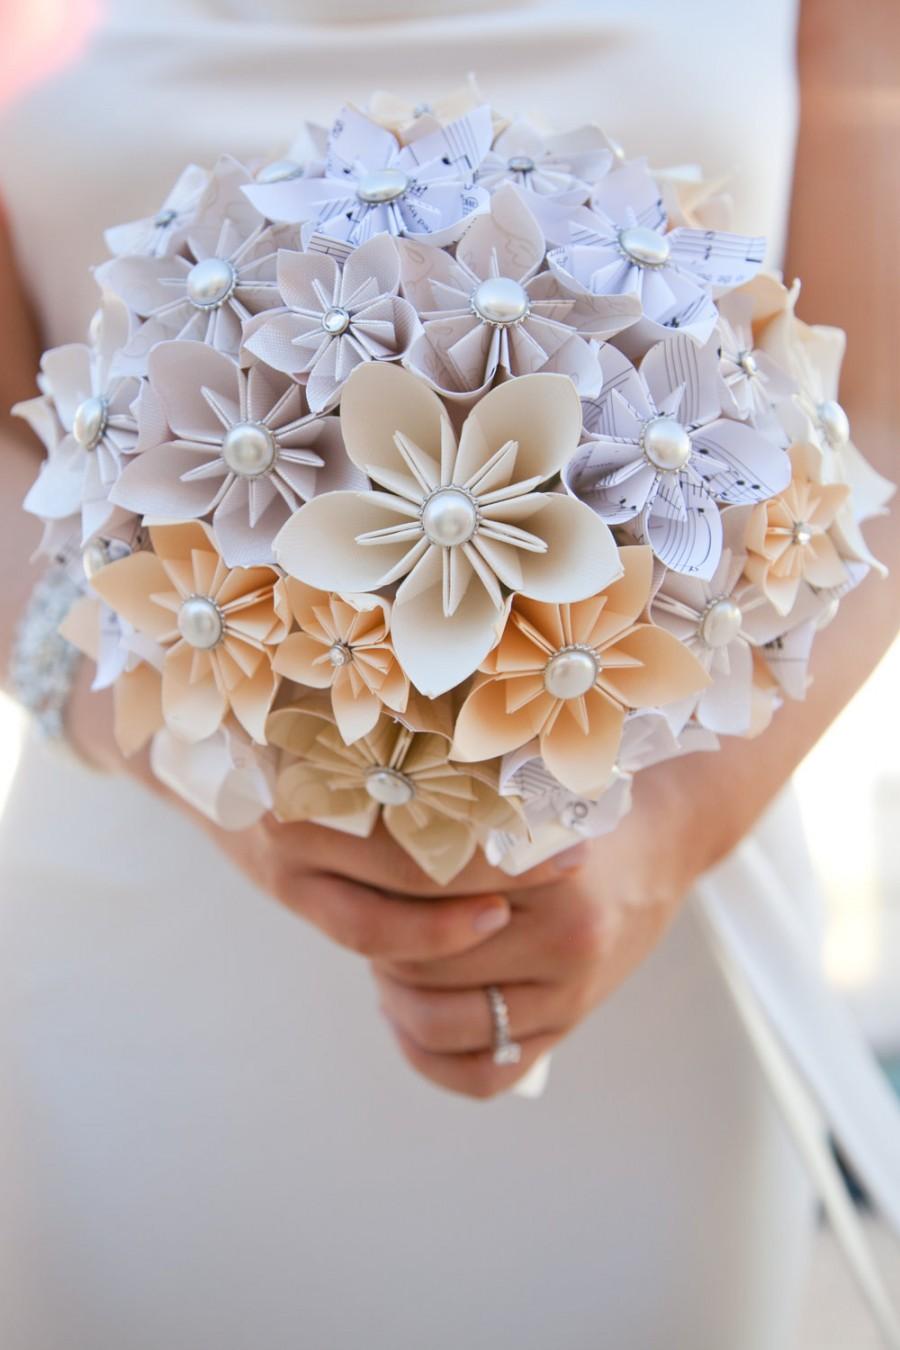
3.4. Origami Flowers
Origami flowers are folded paper creations that showcase the artistry of paper folding. They require precision and skill but result in stunning designs.
4. Techniques for Making Paper Flowers
Learning the techniques for making paper flowers is essential for creating beautiful arrangements. Here are some popular techniques:
4.1. Petal Shaping
Shaping the petals is crucial for achieving a natural look. Techniques include curling the edges with scissors or using a bone folder to create soft bends.
4.2. Layering
Layering petals adds depth to your flowers. Start with larger petals at the base and gradually add smaller petals on top for a fuller appearance.
4.3. Coloring Techniques
Enhance your flowers' appearance by adding color using markers, paint, or ink. This can create a gradient effect or highlight certain areas.
5. Arranging Your Paper Flower Bouquet
Once you have created your paper flowers, the next step is arranging them into a beautiful bouquet. Here are some tips for arranging your paper flower bouquet:
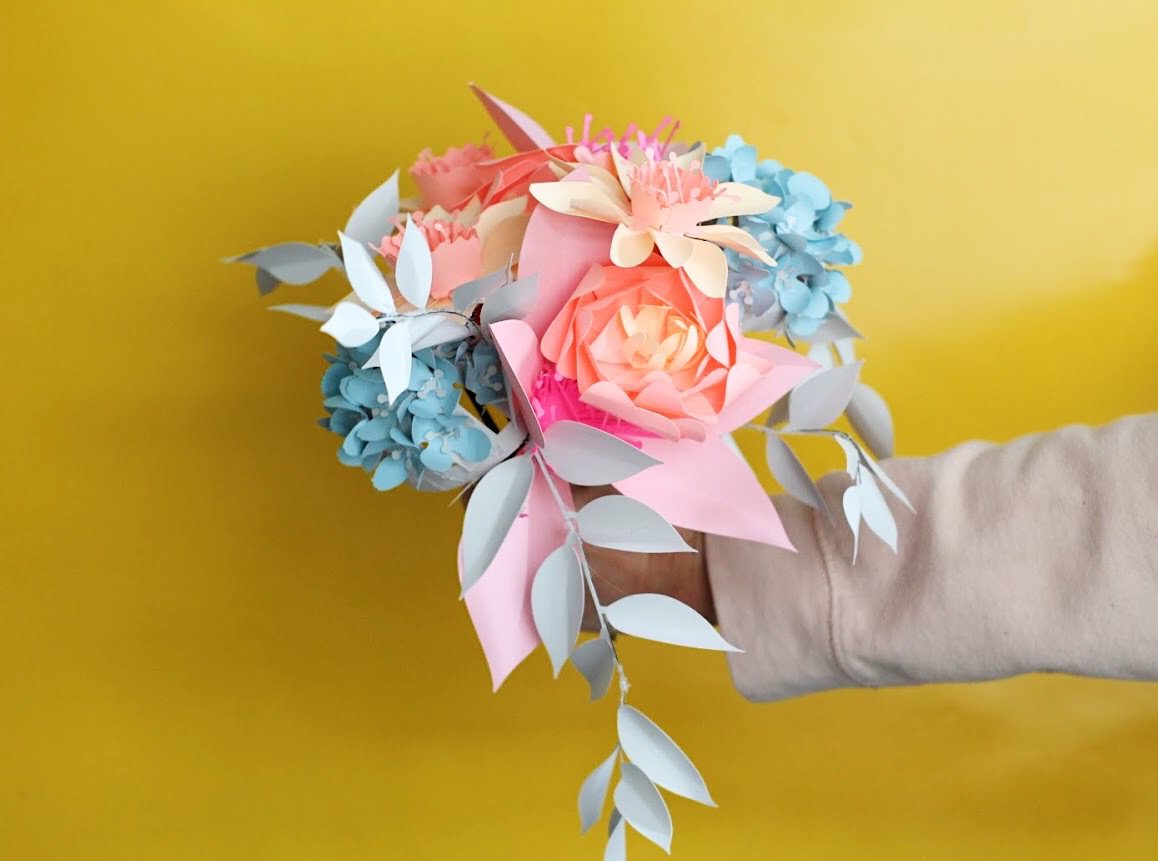
- Choose a Focal Point: Select one or two standout flowers to be the focal point of your arrangement.
- Vary Heights: Arrange flowers at different heights to create visual interest.
- Add Foliage: Incorporate green leaves made of paper to complement the flowers.
- Secure with Floral Tape: Use floral tape to bind the stems together and keep the arrangement secure.
6. Caring for Your Paper Flower Bouquets
One of the significant advantages of paper flower bouquets is their longevity. However, proper care is essential to maintain their beauty:
- Avoid Direct Sunlight: Keep your bouquets in a cool, shaded area to prevent fading.
- Dust Regularly: Gently dust the flowers to keep them looking fresh.
- Store Properly: If storing for a long time, place them in a box to protect from physical damage.
7. Creative Uses for Paper Flower Bouquets
Paper flower bouquets are incredibly versatile and can be used in various ways:
- Weddings: Use as bridal bouquets or centerpieces.
- Home Decor: Enhance your living space with beautiful paper arrangements.
- Gift Giving: Create personalized gifts for loved ones.
- Events: Use as decorations for parties, anniversaries, and other celebrations.
8. Conclusion
In conclusion, paper flower bouquets offer a creative and sustainable alternative to traditional floral arrangements. With a rich history, versatile materials, and various techniques, anyone can create stunning paper flowers that last a lifetime. Whether for personal enjoyment or special occasions, these bouquets are sure to impress.
We encourage you to try your hand at making your paper flower bouquet. Share your creations with us in the comments below, and don’t forget to explore more articles on our site for additional crafting inspiration!
Thank you for reading, and we hope to see you back for more exciting content!
Also Read
Article Recommendations

ncG1vNJzZmivp6x7tMHRr6CvmZynsrS71KuanqtemLyue9WiqZqko6q9pr7SrZirq2hkvaK8xKtkn6SfrLKzecGorKqtlal7qcDMpQ%3D%3D